Wednesday, January 27, 2010

SORRY!


    So Devin's birthday was last Saturday, so of course I needed to do the cake.  The theme for his party was board games, so he wanted me to make a Sorry cake.  I beginning to realize I don't have enough time in the day to do all these cakes.  I think I have spent more time baking cakes the past two weeks than actually playing video games.  What was supposed to be my hobby on the side has suddenly become my main hobby.  Not that I mind, I just need to pace myself better when making the cakes.  I started this one Friday night, and finished about 30 minutes before his party started.  I frosted this one in IMBC because I really <3 the taste of it.  Unfortunately, IMBC needs to crust in the fridge, but I have spent so much time with standard BC, I left it out.  That means the cake wasn't as smooth as I would like and it made placing the pieces very difficult.


  I made my own Marshmallow Fondant for the pieces because I wasn't sure how much I needed.   I hadn't planned on eating it, so I thought about buying the the pre-packaged kind but I didn't think it would be enough.  I didn't realize how far just a little bit of fondant went.  The fondant making went much better time than the stuff I made for my New Years cake.   Korynn even mentioned that she like the way it tasted when she ate the small pieces.  The kids really wanted to help, so I let them make the pieces.


You'll see Kiersten's contribution on the top row.  She made the top row of pieces.

Stats:

  • 10" x 14' square cake.
  • Duncan Hines Marble Fudge Cake prepped as per Cake Mix Dr. "Better than ? cake"
  • Iced with IMBC
  • Filled with Costco Mousse
  • Pieces and details done with MMF
   I decided to try to use the Cake Dr's "Better than ? Cake" even though this wasn't a typical Yellow cake and I wasn't terribly impressed with the cake.  I don't know why, but it just didn't taste as well as normal. 

Saturday, January 23, 2010

Wilton Course 1 Class 3 Complete


    Class 3 was clown week.  Apparently making figures out of butter cream is a pretty big deal and so this was our introduction into it.  The teacher required a two-tone cake and I wanted to try to get red out of Wilton's chocolate butter cream.  I'm still trying to figure out how to make a good Utah Crimson color red and it was suggested I start from chocolate.  Unfortunately, it simply ended up as Maroon.  If I ever need to make a Texas A&M Aggie cake, I have the color.  We also learned the Shell border this week as you can tell from the border at the bottom.  I'm not sure if my frosting was too thick or what, but my shell border didn't turn out that great.  I blew out two disposable bags while trying to pipe my shell border.


   The clown was made by using the Tip 21 star tip.  He turned out OK, but the face really creeped me out.  I called it my Creepy Clown Cake, but my co-workers did not agree that it was creepy.  Also, I forgot to add the meringue to the chocolate frosting and so the sides did not harden.  Since the sides never hardened, I wasn't able to smooth it out very well.  Also, I found out the hard way that trying to smooth a two tone cake can prove troublesome.  You'll notice the little blotch of maroon there on the top of the cake.  I added a star border to cover up the edge, but again the frosting was too soft and didn't harden well due to the lack of meringue.


    Stats:

    • 8 inch round cake
    • Yellow cake mix prepped as per Cake Mix Dr. "Better Than ? Cake"
    • Wiltons Chocolate BC for the sides and filling
    • Wiltons BC for the top, shells and clown
    • Creepy clown head.
Cake Mix Dr.'s "Better Than ? Cake" is very moist and delicious.  I'm not sure I'll ever prep a regular yellow cake any other way.  Next weeks final lesson is the Rose flower,  but this weekend is a Sorry board cake for Devin's birthday.

Also missed this week is Devin's swirl cupcakes.  I found a method online on how to swirl different colors of frostings to cover a cupcake.  I even went out and bought me a brand new 1M tip.  Unfortunately my photographer didn't get any pictures, so I will need to do them again and post pictures.

Wednesday, January 13, 2010

Wilton Course 1 Class 2 Complete!


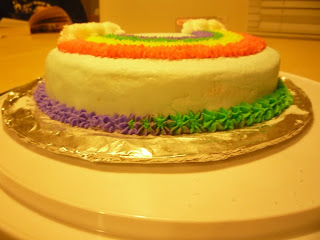
YAY!  This time we actually got to go to class and decorate a cake!  Now we're getting somewhere.  So far it's all pretty basic.  The instructor was still teaching people how to put their tips on the bags.  We practiced with stars, lines, and writing.  I, however, didn't do any writing on the cake.  My handwriting is horrible, and it's even worse when trying to do it with frosting.  Unfortunately, my camera is not so hot, so my pictures are not so hot.  This is the best one I could grab.  We used piping gel to outline the shape of the rainbow, and then just filled in the outlines with stars.  I liked the expanding rainbow look, but ran out of room on the edges.  I wanted to do something in the middle as well, but ran out of time.  The instructor insisted we use white cake for this one to hide the crumbs.

Stats:

  • 1 8" round not torted.
  • Duncan Hines White Cake mix prepped as per box.
  • Iced with Wilton Buttercream.
  • Star Border with Buttercream


To get more practice with stars, we added a star border around the bottom.  In addition, we played with blending the frosting colors.  All we did is remove the tip from one bag and put it onto another bag with a different color without cleaning the tip.  What you end up with is a couple stars in the old color and then the new color starts coming through until you get solid new color.  It's a very cool look.  Next week, I'm going to try to play with some striping.


This is green/yellow mix.  I must admit I had the best cake at the class at the beginning.  Nobody else bothered to smooth theirs.  Some of the other colors the other students used were much better than mine.  I need to work on getting good bright colors.  I smoothed mine with parchment paper and my fondant smoother.  It worked like a charm!  I'm still trying to figure out the feel of the different consistencies, but my instructor mentioned that for frosting a cake, it's almost impossible to get the frosting too thin.

Up Next is the dreaded Clown cake!  The clown heads we're supposed to put on are pretty freaky, but c'est la vie. It is what it is.  We're also going to play around with striping our frosting.  I'm still searching for a nice Utah Crimson color, so this week I'm going to try starting from chocolate icing.  I've heard you can get better reds starting with chocolate.  We shall see!  Also this week end, I'll be making cup cakes for Devin's classmates for his birthday.  Busy cake weekend already!

Till next time - Eat Desert First!

Wednesday, January 6, 2010

Wilton Course 1 Class 1 Complete!

  I had my first Wilton course 1 Cake Decorating instruction last night.  We watched the teacher make Wilton Buttercream and actually play with the different stiffnesses.  Additionally we learned the very basics about bags and tips. All really, really basic stuff.  What seemed odd to me is that it's a cake decorating class, but you never really practice actually frosting a cake.  We have to take a fully frosted cake for the next meeting.  It seems actually frosting your cake should be the first thing that you practice in a cake decorating class.  If you have ever tried to actually frost a cake without crumbs you would understand what a pain it can be.  I haven't decided if I should cheat for my next lesson and do a crumb-coat first before I frost it, or just jump straight to the frosting of it.

Saturday, January 2, 2010

Happy New Years!


   Korynn told me I needed to do fondant for our New Years cake, so this was my first attempt at doing fondant.  It just so happened my co-worker over at cakeoricandothat put up a tutorial on her Marshmallow Fondant (MMF).  The cake turned out really cute and all in all I was pleased with it. Having never worked with the homemade marshmallow fondant, however, it was really a pain to get the texture just right.  That being said, none of us actually liked the fondant coating.  We've decided to ditch the idea of covering our cakes in fondant.  I'll use it for accents or figures, but not for covering.

Stats:

  • 9" Cake Round
  • Duncan Hines Fudge Marble Cake Mix prepped as per box
  • Filled with Chocolate Mousse
  • Iced with Italian Meringue Buttercream (IMBC)
  • Covered in white MMF
  • Decorated with colored MMF

  
     I got new Bake Even strips for Christmas, and this cake baked up like a charm.  It ended up really nice and flat on top.  So much so, that I hardly needed to use my new leveler.


   This was my second attempt at IMBC and let me tell you, this recipe was to die for.  Unlike the last one I tried, this one did not have a buttery taste at all and was really nice and smooth.  It's a little stiff to frost with so I still had some issues while frosting it, but I'm working on that.

    My photographer was too busy playing with her Grandma while I was making the MMF, so I didn't get any pictures of the process.


     Not bad for my first covered cake, I thought :)


   I made Black, Red, Blue and Green fondant for the decorations, and had a heck of a time getting the consistency right on these.  Not to mention that the amounts were to small for my mixer to mix correctly.  At least I got to use my new fondant rolling pin :)

   I got decorating lessons for Christmas and I start next week.  It should be a lot of fun :)